最后家里服务器安装docker,pull到本地服务器
.service脚本暂时没成功
1. 新建docker,并打开端口
1 | https://zls.bndstone.com/2894.html |
1 2 | docker run --name centos72 --privileged -d -e "container=docker" -p 8081:22 -p 80:80 -p 443:443 -p 8082:5901 -p 6080:6080 --restart always ansible/centos7-ansible /usr/sbin/init docker exec -it centos72 /bin/bash |
1 2 | firewall-cmd --zone=public --permanent --add-port=6080/tcp && firewall-cmd --zone=public --permanent --add-port=6080/udp firewall-cmd --reload |
2. 安装noVNC
1 | https://zls.bndstone.com/948.html |
3. 测试成功后把docker push 到hub.docker.com
1 2 3 | docker login ancky2006 输入密码 |
1 2 3 4 5 | docker ps -a //查看容器 id ,会出现容器id: 256e78296280 docker stop 256e78296280 //停目容器 docker commit 256e78296280 ancky2006/images:centos7-noVNC //ancky2006/images 是hub.docker.com 上的目录,必须这要格式,否则push会失败. docker images //查看镜像 docker push ancky2006/images:centos7-noVNC |
4. 家里服务器上把doker 拉回来.
1 | docker pull ancky2006/images:centos7-noVNC |
1 2 | docker run --name centos7-noVNC --privileged -d -e "container=docker" -p 8081:22 -p 8082:80 -p 443:443 -p 8083:5901 -p 6080:6080 --restart always ancky2006/images:centos7-noVNC /usr/sbin/init docker exec -it centos7-noVNC /bin/bash |
5. 启动noVNC
1 2 | cd /root/noVNC/utils/websockify ./websockify.py --web=/root/noVNC 6080 localhost:5901 |
会出现如下报错
1 2 3 4 5 6 7 8 9 10 11 12 13 14 | Traceback (most recent call last): File "/usr/local/python3/lib/python3.8/runpy.py", line 184, in _run_module_as_main mod_name, mod_spec, code = _get_module_details(mod_name, _Error) File "/usr/local/python3/lib/python3.8/runpy.py", line 143, in _get_module_details return _get_module_details(pkg_main_name, error) File "/usr/local/python3/lib/python3.8/runpy.py", line 110, in _get_module_details __import__(pkg_name) File "/root/noVNC/utils/websockify/websockify/__init__.py", line 1, in <module> from websockify.websocket import * File "/root/noVNC/utils/websockify/websockify/websocket.py", line 21, in <module> import ssl File "/usr/local/python3/lib/python3.8/ssl.py", line 98, in <module> import _ssl # if we can't import it, let the error propagate ImportError: libssl.so.1.1: cannot open shared object file: No such file or directory |
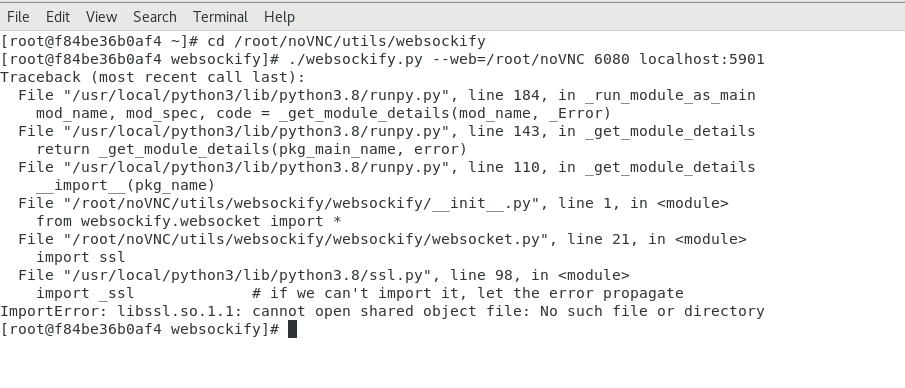
6. 安装openssl
1 2 3 4 5 6 7 8 | wget https://linuxsoft.bndstone.com/openssl/openssl-1.1.1.tar.gz 或 http://www.openssl.org/source/openssl-1.1.1.tar.gz tar -zxvf openssl-1.1.1.tar.gz //# 解压 cd openssl-1.1.1 //# 进入 ./config --prefix=/usr/local/openssl shared zlib //# 配置 make && make install # 安装 echo "export LD_LIBRARY_PATH=$LD_LIBRARY_PATH:/usr/local/openssl/lib" >> /etc/profile //# 修改环境变量 source /etc/profile |
7. 重新启动noVNC就成功
1 2 | cd /root/noVNC/utils/websockify ./websockify.py --web=/root/noVNC 6080 localhost:5901 |
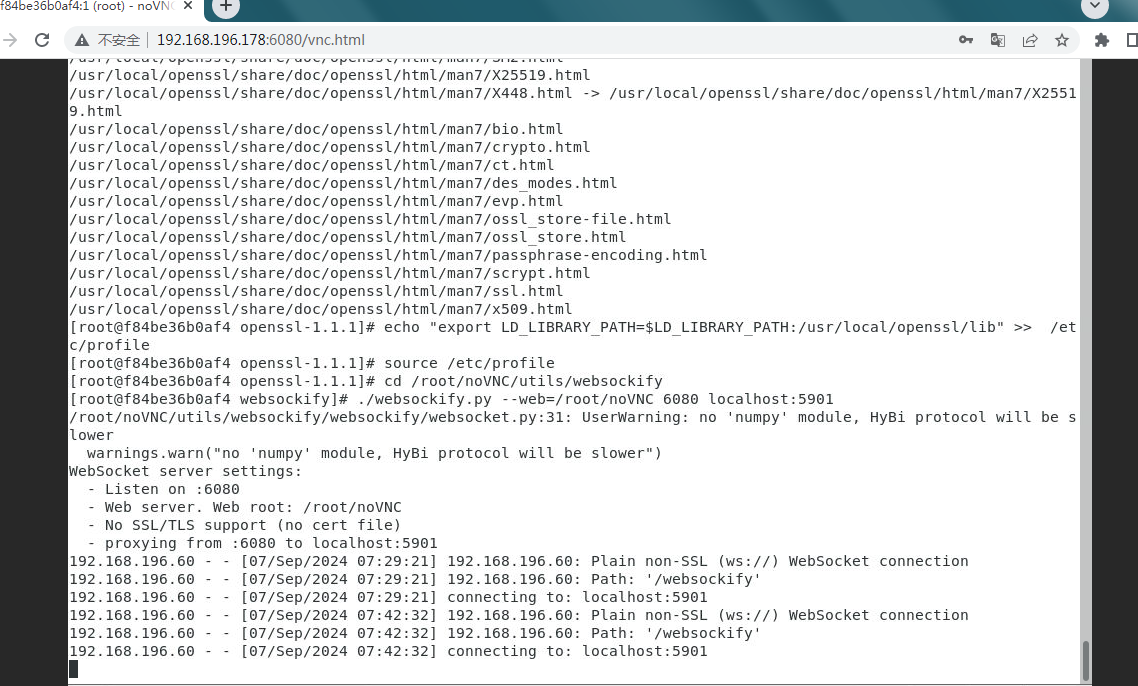
Python3.8 , 转发 到 J4125失败 . 因为家里网络没翻墙.会出现软件无法下载的报错.
17 noVNC 命令详解
0-1. 前提,香港服务器,家里服务器都已经安装好了zerotier .
1 | 安装zerotier参考: https://zls.bndstone.com/529.html |
1 2 | curl -s https://install.zerotier.com/ | sudo bash //CentOS 7 安装ZeroTier-One zerotier-cli join c7c8172af117fa16 //加入网络c7c8172af117fa16 |
香港服务器: zerotier IP: 172.26.14.50 公网IP 47.76.110.16
家里服务器: zerotier IP: 172.26.206.56 无公网IP
0-2. 测试一下能否ping 通家里IP
1 | ping 172.26.206.56 |
返回如下信息说明已经成功
1 2 3 4 5 6 | [root@iZj6cgkm2zgohzuepijeqzZ ~]# ping 172.26.206.56 PING 172.26.206.56 (172.26.206.56) 56(84) bytes of data. 64 bytes from 172.26.206.56: icmp_seq=1 ttl=64 time=365 ms 64 bytes from 172.26.206.56: icmp_seq=2 ttl=64 time=98.2 ms 64 bytes from 172.26.206.56: icmp_seq=3 ttl=64 time=93.2 ms 64 bytes from 172.26.206.56: icmp_seq=4 ttl=64 time=94.1 ms |
1. 增加一条A记录 tokoler.com –> 47.76.110.16
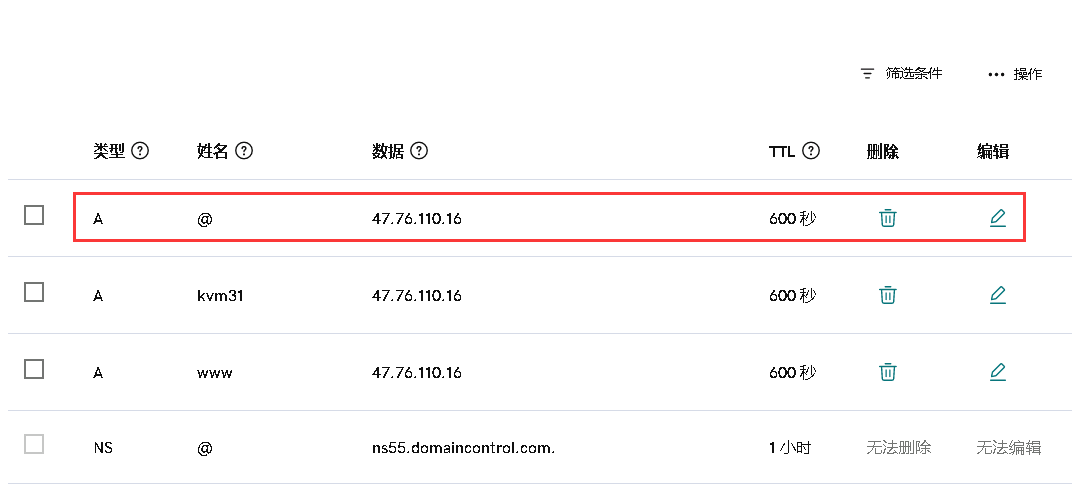
2. 香港服务器: 放行6080端口
172.26.14.50 6080 –> 172.26.206.56 6080
1 2 3 4 5 6 7 8 9 | yum install -y firewalld && yum install -y firewalld-filesystem && yum install -y firewall-config //默认有安装就跳过这步 systemctl start firewalld.service //开启firewalld systemctl enable firewalld.service //开机自启动firewalld firewall-cmd --zone=public --permanent --add-port=6080/tcp //放行端口 firewall-cmd --zone=public --permanent --add-port=6080/udp //放行端口 firewall-cmd --reload |
3. 阿里网页放行6080端口
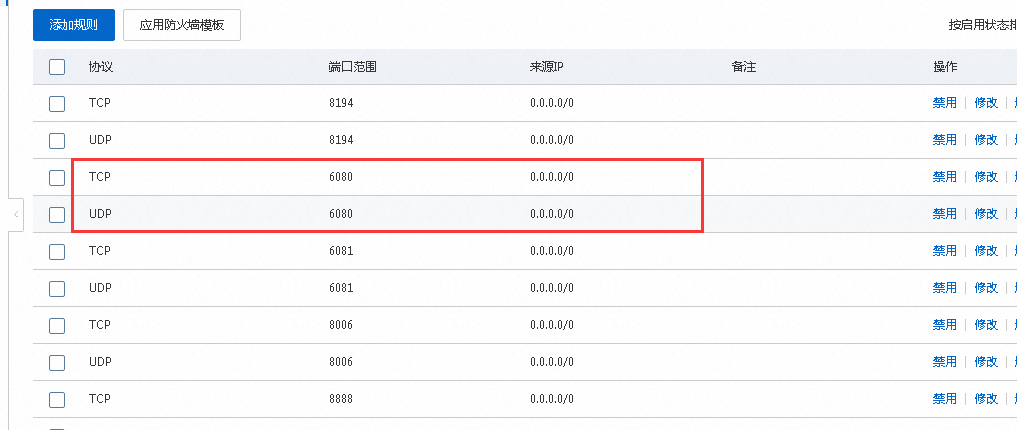
4. 家里服务器也要放行6080端口
1 2 3 4 5 6 7 8 9 | yum install -y firewalld && yum install -y firewalld-filesystem && yum install -y firewall-config //默认有安装就跳过这步 systemctl start firewalld.service //开启firewalld systemctl enable firewalld.service //开机自启动firewalld firewall-cmd --zone=public --permanent --add-port=6080/tcp //放行端口 firewall-cmd --zone=public --permanent --add-port=6080/udp //放行端口 firewall-cmd --reload |
5. 香港服务器: 端口转发
5-1. 内核参数文件sysctl.conf配置ip转发功能
1 | vi /etc/sysctl.conf |
1 | net.ipv4.ip_forward = 1 //这行没有的话就加这行 |
1 | sysctl -p //命令生效 |
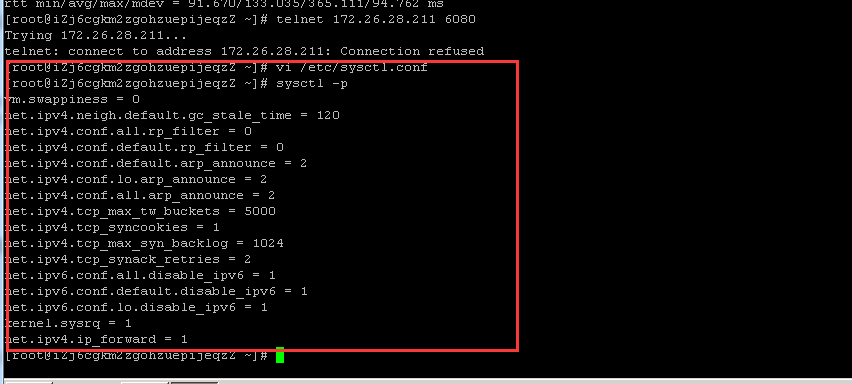
5-2. 端口转发
本机 6080 –> 172.26.206.56 6080
1 2 3 | firewall-cmd --permanent --add-masquerade firewall-cmd --zone=public --permanent --add-rich-rule='rule family="ipv4" forward-port port="6080" protocol="tcp" to-port="6080" to-addr="172.26.206.56"' firewall-cmd --reload |
5-3. 测试下 47.76.110.16 6080 端口是否开放成功
5-3-1. 用香港服务器测试
1 | telnet 172.26.206.56 6080 |
返回如下信息:
1 2 | Trying 172.26.206.56... telnet: connect to address 172.26.206.56: Connection refused |
5-3-2. 然后家里服务器 测试 127.0.0.1 6080
1 | telnet 127.0.0.1 6080 |
返回如下信息:
1 2 | Trying 127.0.0.1... telnet: connect to address 127.0.0.1: Connection refused |
以上信息不是因为6080端口没放行成功,是因为只有以下vnc.html程序运行时才会出现如下正确返回信息.
暂时还没开启,所以返回错误信息
1 2 3 4 | [root@iZj6cgkm2zgohzuepijeqzZ ~]# telnet 47.76.110.16 6080 Trying 47.76.110.16... Connected to 47.76.110.16. Escape character is '^]'. |
香港服务器也放行了端口,
阿里云页面也放行了端口,
家里服务器也放行了端口.
香港服务器有设置端口转发
6. 开始配置noVNC
6-3. 家里服务器安装git,因为下一步要克隆websockify到服务器.
1 | yum install -y git |
6-4. 下载解压noVNC
1 | 下载地址: https://linuxsoft.bndstone.com/noVNC/v1.5.0.tar.gz |
1 2 3 4 5 6 | yum install -y wget wget https://linuxsoft.bndstone.com/noVNC/v1.5.0.tar.gz // 或 https://github.com/novnc/noVNC/archive/refs/tags/v1.5.0.tar.gz tar -zxvf v1.5.0.tar.gz mv noVNC-1.5.0 noVNC cd noVNC |
6-5. 运行安装noVNC [第一次运行,会自动下载websockify]
1 2 | cd /root/noVNC/utils/ ./novnc_proxy --vnc localhost:5901 |
报错如下:
1 2 | /root/noVNC/utils/websockify/run: line 4: exec: python3: not found Failed to start WebSockets proxy |
CentOS需要依赖于Python3.8,所以CentOS需要先安装Python3.8
6-6. centos7下安装python3.8
1 | https://www.jianshu.com/p/15f40edefb13 |
6-6-1. 查看当前python版本
1 2 3 4 5 | [root@iZwz99sau950q2nhb3pn0aZ ~]# python Python 2.7.5 (default, Aug 7 2019, 00:51:29) [GCC 4.8.5 20150623 (Red Hat 4.8.5-39)] on linux2 Type "help", "copyright", "credits" or "license" for more information. >>> |
可以看到执行python,默认是2.7
6-6-2. 安装依赖包
1 | yum install -y zlib zlib-devel bzip2-devel openssl-devel ncurses-devel sqlite-devel readline-devel tk-devel gcc make libffi-devel |
编译python源码时,需要一些依赖包,一次安装完毕
6-6-3. 安装wget
1 | yum install -y wget |
这个包是为了下载python源码用的
6-6-4.安装openssl
为了使用pip install 包时避免出现however the ssl module in Python is not available等错误,需要先安装open ssl
1 2 3 4 5 6 7 8 | wget http://www.openssl.org/source/openssl-1.1.1.tar.gz //# 下载openssl安装包 tar -zxvf openssl-1.1.1.tar.gz //# 解压 cd openssl-1.1.1 //# 进入 ./config --prefix=/usr/local/openssl shared zlib //# 配置 make && make install # 安装 echo "export LD_LIBRARY_PATH=$LD_LIBRARY_PATH:/usr/local/openssl/lib" >> /etc/profile //# 修改环境变量 source /etc/profile |
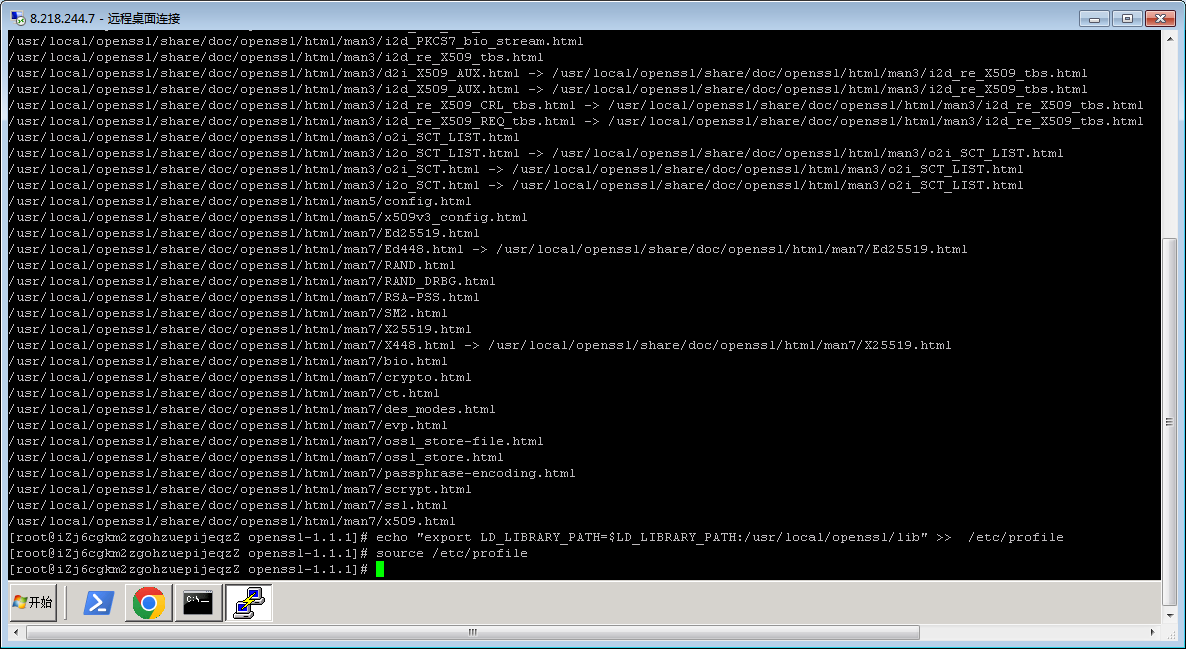
6-6-5. 下载源码包
1 | wget https://linuxsoft.bndstone.com/python/Python-3.8.1.tgz //或 https://www.python.org/ftp/python/3.8.1/Python-3.8.1.tgz |
我是下载的最新的python3.8,如果想安装其他版本,去python官网下载页面下载对应的版本即可。
但是这个下载链接比较慢,我是用迅雷下载到本地之后,再scp到服务器的。
1 | python官网: https://www.python.org/downloads/ |
6-6-6. 解压安装
1 2 3 4 5 | tar -zxvf Python-3.8.1.tgz //# 解压压缩包 cd Python-3.8.1 //# 进入文件夹 ./configure --prefix=/usr/local/python3 --with-openssl=/usr/local/openssl --enable-optimizations //# 配置安装位置 make && make install //# 安装 |
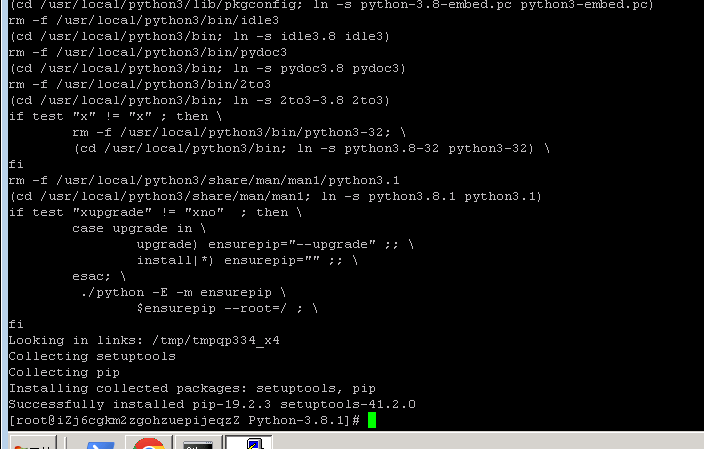
6-6-7. 如果最后没提示出错,就代表正确安装了,在/usr/local/目录下就会有python3目录
1 2 3 | [root@iZj6cgkm2zgohzuepijeqzZ local]# cd /usr/local/ [root@iZj6cgkm2zgohzuepijeqzZ local]# ls aegis bin etc games include lib lib64 libexec openssl python3 sbin share src |
接下去的内容就没再测试了.
1 2 3 4 5 6 7 8 9 10 11 12 13 14 15 16 17 18 | if test $? -ne 0 ; then \ echo "generate-posix-vars failed" ; \ rm -f ./pybuilddir.txt ; \ exit 1 ; \ fi Could not import runpy module Traceback (most recent call last): File "/root/openssl-1.1.1/Python-3.8.1/Lib/runpy.py", line 15, in <module> import importlib.util File "/root/openssl-1.1.1/Python-3.8.1/Lib/importlib/util.py", line 14, in <module> from contextlib import contextmanager File "/root/openssl-1.1.1/Python-3.8.1/Lib/contextlib.py", line 4, in <module> import _collections_abc SystemError: <built-in function compile> returned NULL without setting an error generate-posix-vars failed make[1]: *** [pybuilddir.txt] Error 1 make[1]: Leaving directory `/root/openssl-1.1.1/Python-3.8.1' make: *** [profile-opt] Error 2 |
1 | https://zls.bndstone.com/4757.html |
6-6-8. 添加软连接
1 2 | ln -s /usr/local/python3/bin/python3.8 /usr/bin/python3 //#添加python3的软链接 ln -s /usr/local/python3/bin/pip3.8 /usr/bin/pip3 //#添加 pip3 的软链接 |
6-6-9. 好了,我们来测试一下python3
1 2 3 4 5 | [root@iZj6cgkm2zgohzuepijeqzZ local]# python3 Python 3.8.1 (default, Jul 9 2024, 17:10:01) [GCC 4.8.5 20150623 (Red Hat 4.8.5-44)] on linux Type "help", "copyright", "credits" or "license" for more information. >>> |
6-6-10. 这里我没有链接到python上,是因为yum要用到python2才能执行,所以现在输入python的话还是会进入python2.7,输入python3才会进入python3.8
如果执意想要链接到python的话,就得修改一下yum的配置:
1 2 3 4 5 | vi /usr/bin/yum 把 #! /usr/bin/python 修改为 #! /usr/bin/python2 vi /usr/libexec/urlgrabber-ext-down 把 #! /usr/bin/python 修改为 #! /usr/bin/python2 |
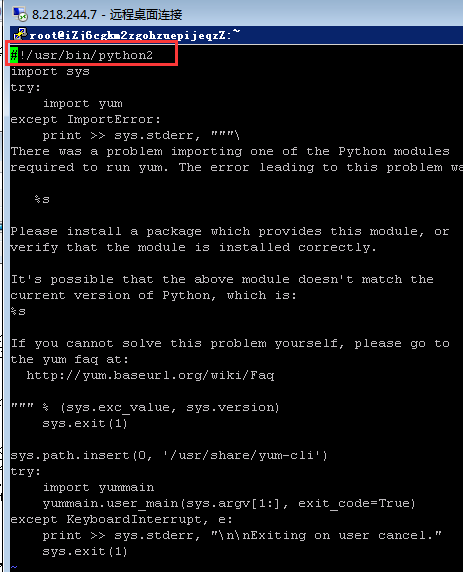
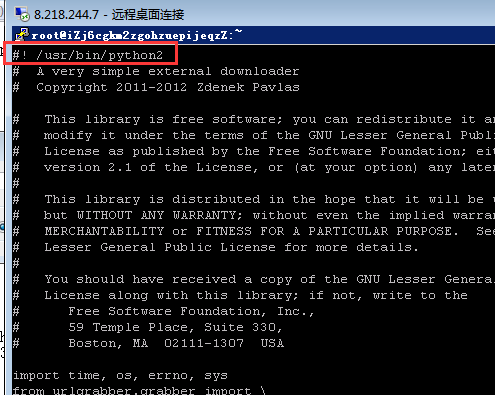
6-6-11. 测试看 python3 是否成功
1 2 3 4 5 | [root@iZj6cgkm2zgohzuepijeqzZ ~]# python3 Python 3.8.1 (default, Jul 9 2024, 17:10:01) [GCC 4.8.5 20150623 (Red Hat 4.8.5-44)] on linux Type "help", "copyright", "credits" or "license" for more information. >>> |
6-7. 重复6-5的步骤 (运行安装noVNC [第一次运行,会自动下载websockify])
1 2 | cd /root/noVNC/utils/ ./novnc_proxy --vnc localhost:5901 |
弹出如下页面,说明已经成功
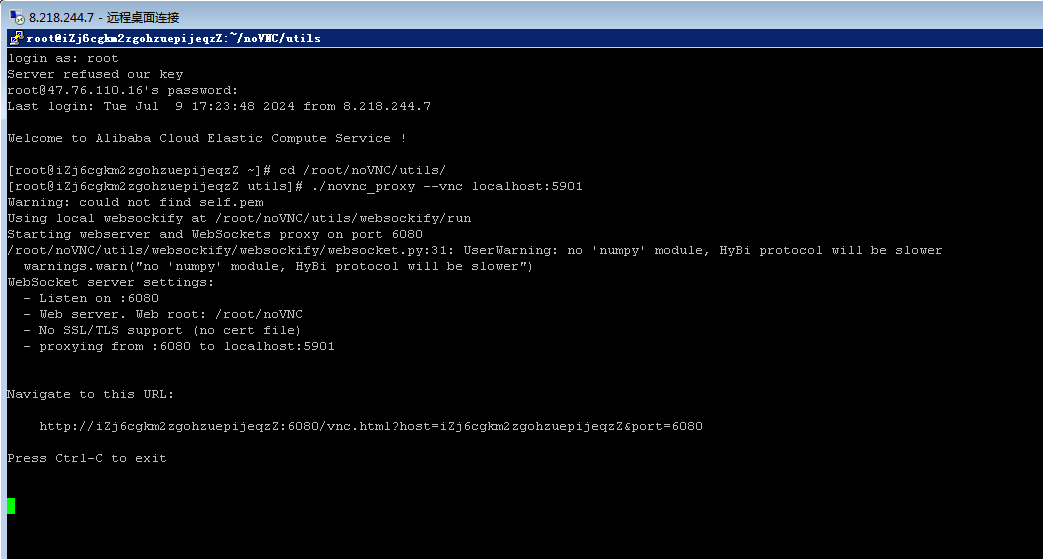
6-8. 奇怪,我这边打不开这个页面
1 | http://iZj6cgkm2zgohzuepijeqzZ:6080/vnc.html?host=iZj6cgkm2zgohzuepijeqzZ&port=6080 |
6-9. 启动noVNC
1 2 | cd /root/noVNC/utils/websockify ./websockify.py --web=/root/noVNC 6080 localhost:5901 |
6-10. 打开如下页面就已经成功了
1 2 | http://47.76.110.16:6080/vnc.html http://tokoler.com:6080/vnc.html |
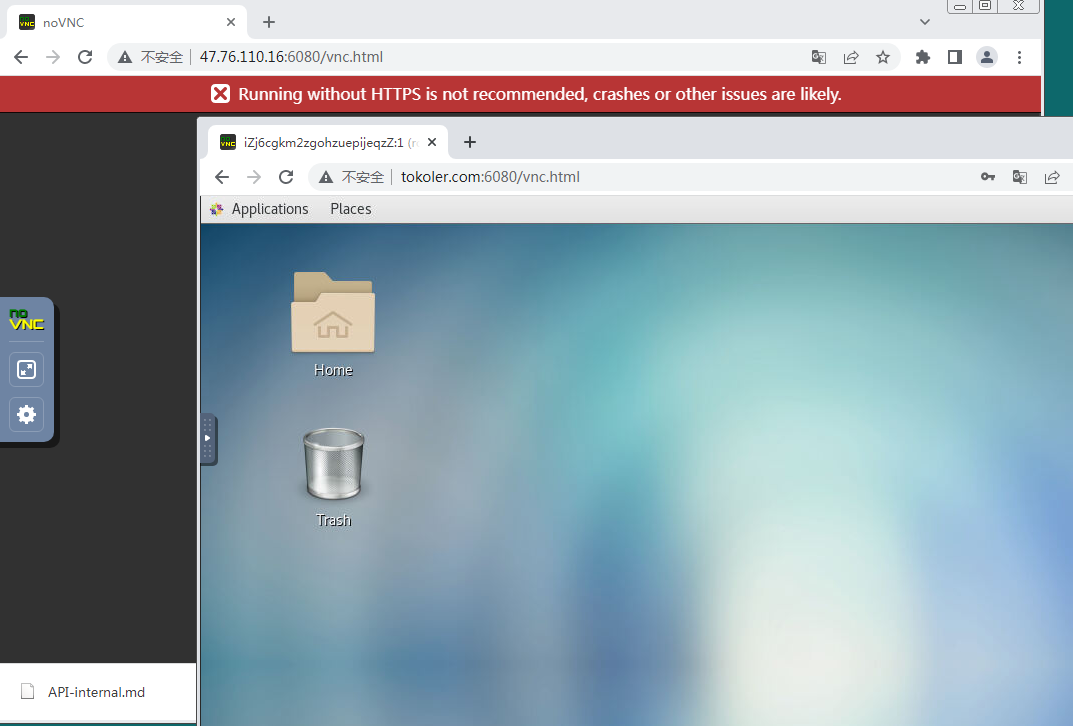
8. 安装nginx,certbot,并申请ssl证书
1 | https://zls.bndstone.com/4806.html |
ssl证书信息如下:
查找 www.tokoler.com.conf 配置文件,会返回位置: /etc/letsencrypt/renewal/www.tokoler.com.conf
1 | find / -name '*www.tokoler.com.conf*' |
查看配置文件
1 | cat /etc/letsencrypt/renewal/www.tokoler.com.conf |
会返回如下信息:
1 2 3 4 5 6 | version = 1.11.0 archive_dir = /etc/letsencrypt/archive/www.tokoler.com cert = /etc/letsencrypt/live/www.tokoler.com/cert.pem privkey = /etc/letsencrypt/live/www.tokoler.com/privkey.pem chain = /etc/letsencrypt/live/www.tokoler.com/chain.pem fullchain = /etc/letsencrypt/live/www.tokoler.com/fullchain.pem |
这时可以看到 https://www.tokoler.com 已经可以正常访问了.

9. http://www.tokoler.com:6080 加入ssl证书
加入如下信息:
1 2 | --cert=CERT SSL certificate file --key=KEY SSL key file (if separate from cert) |
9-1. 加入ssl证书
1 2 | cd /root/noVNC/utils/websockify ./websockify.py --web=/root/noVNC --cert=/etc/letsencrypt/live/www.tokoler.com/cert.pem --key=/etc/letsencrypt/live/www.tokoler.com/privkey.pem 6080 localhost:5901 |
9-2. 重新启动nginx
1 | systemctl restart nginx.service |
再打开 https://www.tokoler.com:6080/ 就可以访问了

10. 把 443 端口转向到 6080 端口
1 | https://zls.bndstone.com/913.html |
10-1. 内核参数文件sysctl.conf配置ip转发功能
1 | vi /etc/sysctl.conf |
1 | net.ipv4.ip_forward = 1 |
1 | sysctl -p //命令生效 |
10-2. firewall端口转发
443 —> 6080
1 2 3 | firewall-cmd --permanent --add-masquerade firewall-cmd --zone=public --permanent --add-rich-rule='rule family="ipv4" forward-port port="443" protocol="tcp" to-port="6080"' firewall-cmd --reload |
10-3. 再打开 https://www.tokoler.com/ 已经成功了
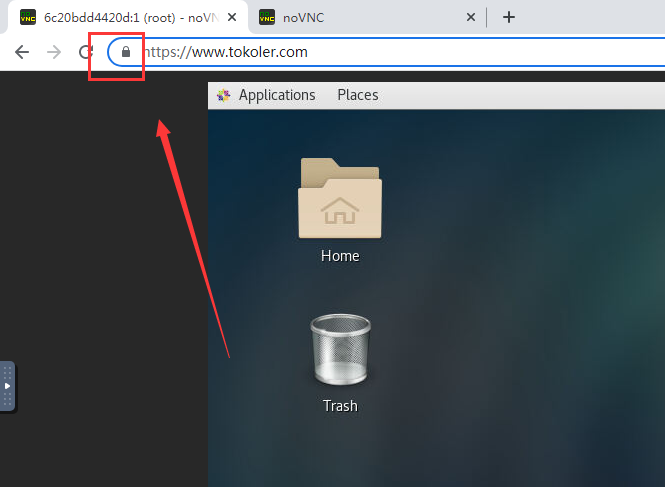
11. 在实际应用中,不可能为每台虚拟机都架一个代理,这种方式对端口号的消耗也是巨大的,同时 VNC 通常是集成在前端页面,那有没有可能仅开一个端口,而实现代理多台虚拟机呢,答案自然是可以。
在 websockify 项目的 Wiki 主页介绍了实现一个端口,多个代理的方法。
实现的原理就是 websocketproxy.py 这个代理从一个指定的 token 目录读取 token 文件,一个 token 文件通常对应一台客户机(虚拟机)。token文件内容形如 token1: host1:port1 ,这里的 token1 是全局唯一的一个字符串标识,host1 是客户机(虚拟机)所在的宿主机的 ip 地址,本例中就是 Node1 的 ip,而 port1 是客户机(虚拟机) VNC Server 的端口号,本例中就是 Guest1 的 VNC Server 的端口号。因此,本例中名为 generic 的客户机(虚拟机)Guest1 的 token 文件内容为:
11-1. noVNC 更改tokenIP
1 2 3 4 | cd /root/noVNC mkdir token cd /root/noVNC/token vi token.conf |
注意:localhost前面有个空格
1 2 3 | kvm01: localhost:5901 kvm11: localhost:5911 kvm21: localhost:5921 |
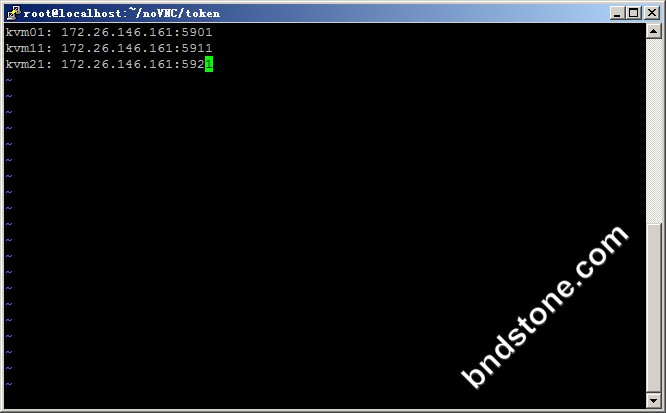
12-1. 启动中加入token,证书
只要加入如下一条
1 | --target-config=/root/noVNC/token/token.conf |
现在代码变成
1 2 | cd /root/noVNC/utils/websockify ./websockify.py --web=/root/noVNC --cert=/etc/pki/tls/certs/novnc.pem --target-config=/root/noVNC/token/token.conf 6080 |
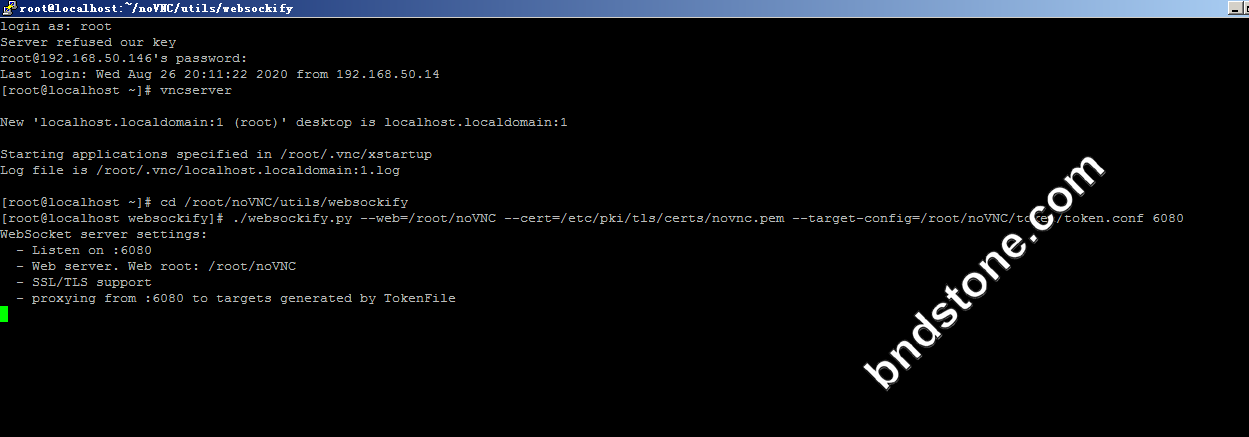
12-2. 域名访问
1 2 | https://www.tokoler.com/vnc.html?path=?token=kvm01 https://www.tokoler.com/vnc.html?path=?token=kvm11 |
暂时还没成功,还是在桌面版Terminal上用手动开启
13. 设置开机自启
1 | https://blog.csdn.net/Sukura111/article/details/127981838 |
13-1. 创建 start_novnc.sh
1 | vi /root/start_novnc.sh |
复制下面到脚本
1 2 | #!/bin/bash nohup /root/noVNC/utils/novnc_proxy --vnc --cert=/etc/letsencrypt/live/www.tokoler.com/cert.pem --key=/etc/letsencrypt/live/www.tokoler.com/privkey.pem --listen 6080 localhost:5901 & |
备注:
nohup: 后台不挂断运行
13-2. 附加权限
1 | chmod u+x /root/start_novnc.sh |
13-3. 编写.service脚本
1 | vi /etc/systemd/system/novnc.service |
1 2 3 4 5 6 7 8 9 10 11 12 13 14 | [Unit] Description= noVNC Service(noVNC) After=tigervnc.target [Service] # backend running Type=forking ExecStart=/root/start_novnc.sh ExecStop=/bin/kill -9 $(ps -e | grep 'receive' | awk '{print $1}') Restart=on-failure [Install] WantedBy=multi-user.target |
13-4. 开启,关闭noVNC
1 2 3 4 5 6 | systemctl status novnc.service systemctl start novnc.service systemctl stop novnc.service systemctl restart novnc.service systemctl enable novnc.service systemctl disable novnc.service |
13-5. 重启
1 | reboot |