CentOS 7安装fail2ban+Firewalld防止SSH爆破与CC攻击[进阶篇]
1 2 | https://service.imydl.com/yunwei/594.html https://www.wanvi.net/10412.html |
1. 查询网站nginx日志
1 2 | cd /usr/local/nginx/conf/vhost/ cat www.bndstone.com.conf |
可以看到一行如下信息:
1 | access_log /home/wwwlogs/www.bndstone.com.log; |
说明 www.bndstone.com 的日志在如下路径: /home/wwwlogs/www.bndstone.com.log
同样道理 www.huajunstone.com 的日志在如下路径: /home/wwwlogs/www.huajunstone.com.log
2. 防止CC攻击
这里仅以Nginx为例,使用fail2ban来监视nginx日志,匹配短时间内频繁请求的IP,并使用firewalld将其IP屏蔽,达到CC防护的作用
2-1-1. 需要先新建一个nginx日志匹配规则
1 | vi /etc/fail2ban/filter.d/nginx-vermaxcn-cc.conf |
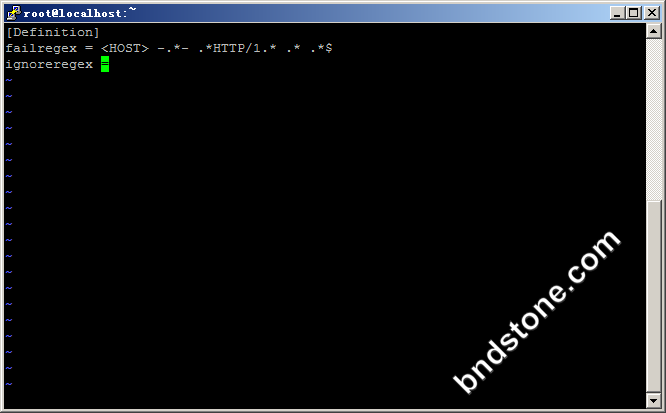
2-1-2. 加入如下代码
1 2 3 | [Definition] failregex = <HOST> -.*- .*HTTP/1.* .* .*$ ignoreregex = |

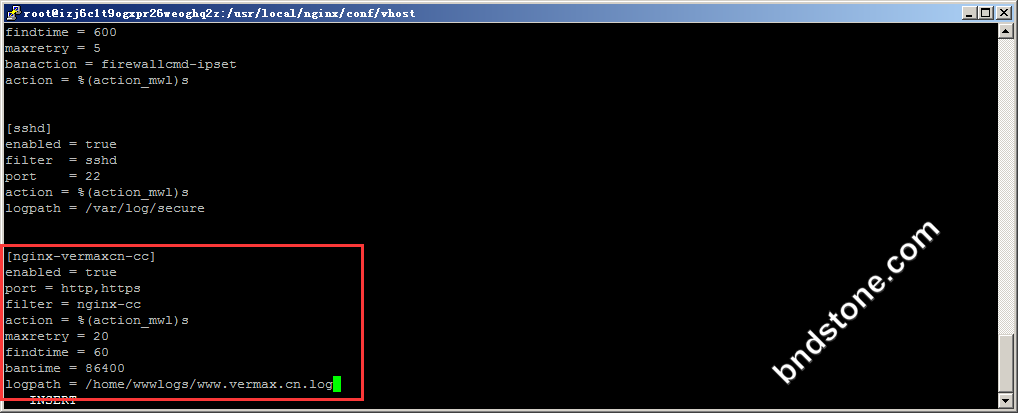
2-1-3. 继续修改jail.local追加如下内容
1 | vi /etc/fail2ban/jail.local |
1 2 3 4 5 6 7 8 9 | [nginx-vermaxcn-cc] enabled = true port = http,https filter = nginx-cc action = %(action_mwl)s maxretry = 20 findtime = 60 bantime = 86400 logpath = /home/wwwlogs/www.bndstone.com.log |
1 | systemctl restart fail2ban.service |

上面的配置意思是如果在60s内,同一IP达到20次请求,则将其IP ban 一天,上面只是为了测试,请根据自己的实际情况修改。
[nginx-vermaxcn-cc] 这个对应 /etc/fail2ban/filter.d/nginx-vermaxcn-cc.conf 文件
logpath = /home/wwwlogs/www.bndstone.com.log 这个是nginx日志
同样道理:
2-2-1. 需要先新建一个nginx日志匹配规则
1 | vi /etc/fail2ban/filter.d/nginx-huajunstone-cc.conf |
2-2-2. 加入如下代码
1 2 3 | [Definition] failregex = <HOST> -.*- .*HTTP/1.* .* .*$ ignoreregex = |
2-2-3. 继续修改jail.local追加如下内容
1 | vi /etc/fail2ban/jail.local |
1 2 3 4 5 6 7 8 9 | [nginx-huajunstone-cc] enabled = true port = http,https filter = nginx-cc action = %(action_mwl)s maxretry = 20 findtime = 60 bantime = 86400 logpath = /home/wwwlogs/www.huajunstone.com.log |
1 | systemctl restart fail2ban.service |
[nginx-huajunstone-cc] 这个对应 /etc/fail2ban/filter.d/nginx-huajunstone-cc.conf 文件
logpath = /home/wwwlogs/www.huajunstone.com.log 这个是nginx日志
3. 防止Wordpress爆破
如果您经常分析日志会发现有大量机器人在扫描wordpress登录页面wp-login.php,虽然对方可能没成功,但是为了避免万一还是将他IP干掉为好。
3-1-1. 需要先新建一个nginx日志匹配规则
1 | vi /etc/fail2ban/filter.d/wordpress-vermaxcn.conf |
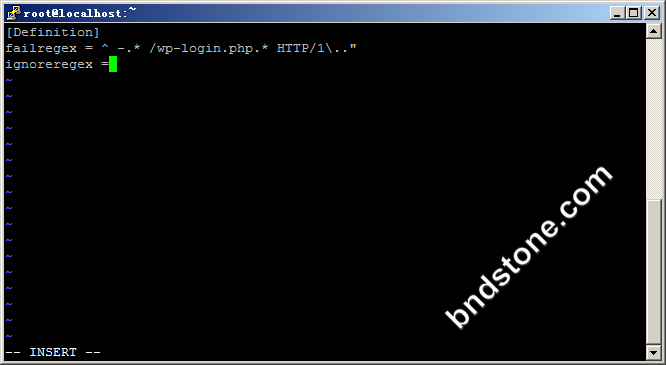
3-1-2. 加入如下代码
1 2 3 | [Definition] failregex = ^ -.* /wp-login.php.* HTTP/1\.." ignoreregex = |

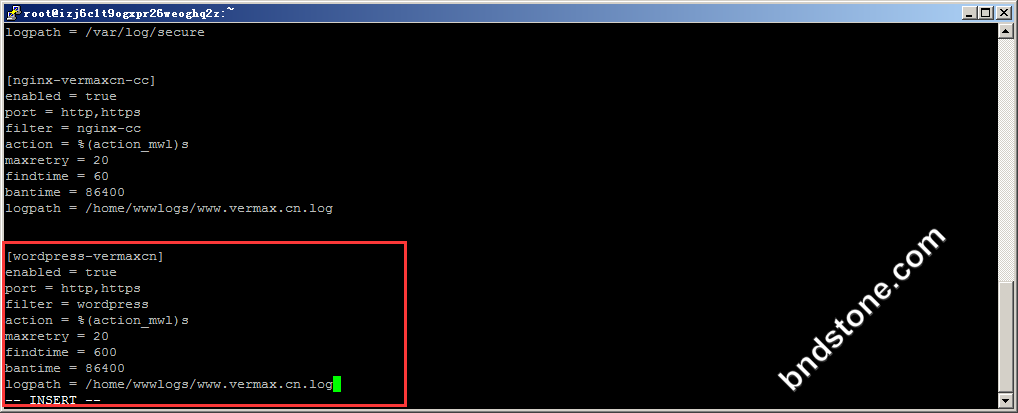
继续修改jail.local追加如下内容
1 | vi /etc/fail2ban/jail.local |
1 2 3 4 5 6 7 8 9 | [wordpress-vermaxcn] enabled = true port = http,https filter = wordpress action = %(action_mwl)s maxretry = 20 findtime = 600 bantime = 86400 logpath = /home/wwwlogs/www.bndstone.com.log |
1 | systemctl restart fail2ban.service |
上面的配置意思是如果在600s[10分钟]内,同一IP达到20次请求,则将其IP ban 一天。
[wordpress-vermaxcn] 这个对应 /etc/fail2ban/filter.d/wordpress-vermaxcn.conf 文件
logpath = /home/wwwlogs/www.bndstone.com.log 这个是nginx日志

同样道理
3-1-1. 需要先新建一个nginx日志匹配规则
1 | vi /etc/fail2ban/filter.d/wordpress-huajunstone.conf |
3-1-2. 加入如下代码
1 2 3 | [Definition] failregex = ^ -.* /wp-login.php.* HTTP/1\.." ignoreregex = |

继续修改jail.local追加如下内容
1 | vi /etc/fail2ban/jail.local |
1 2 3 4 5 6 7 8 9 | [wordpress-huajunstone] enabled = true port = http,https filter = wordpress action = %(action_mwl)s maxretry = 20 findtime = 600 bantime = 86400 logpath = /home/wwwlogs/www.huajunstone.com.log |
1 | systemctl restart fail2ban.service |
4-1. 验证:
用家里电脑 一直刷 https://www.huajunstone.com/wp-login.php .刷了几十遍,没被封.感觉没起做用啊!
分析日志发现一大堆错误
1 | tail /var/log/fail2ban.log |
5-1. 把日志改成 /home/wwwlogs/access.log 测试下效果
1 | logpath = /home/wwwlogs/access.log |
6-1. 还是不行.
7-1. 这个报错是 发邮件通知出错.这个不管他
1 2 3 4 5 6 7 | 2020-08-02 22:26:31,934 fail2ban.utils [3827]: ERROR 7f343468be40 -- stderr: 'sendmail: fatal: parameter inet_interfaces: no local interface found for ::1' 2020-08-02 22:26:31,934 fail2ban.utils [3827]: ERROR 7f343468be40 -- returned 75 2020-08-02 22:26:31,934 fail2ban.actions [3827]: ERROR Failed to start jail 'wordpress-huajunstone' action 'sendmail-whois-lines': Error starting action Jail('wordpress-huajunstone')/sendmail-whois-lines |