Nginx反向代理实现docker容器域名解析 —失败.
1、容器内安装 lnmp1.6 ,千万别装 lnmp1.8,否则会引起容器内无法通信的问题(6-1、6-2、).
phpmyadmin 可以从别的地方移过来
2、8.218.77.154:8092 一直正常,但 web1.bndstone.com 却一直不正常,不知道是哪里设置错了.
1 2 3 | https://blog.csdn.net/lunan/article/details/108639626 https://blog.51cto.com/u_11739124/3012176?b=totalstatistic https://blog.csdn.net/qq_34200979/article/details/123016644 |
实现如下:
1 2 | web1.bndstone.com ---> docker 1 虚拟机. web2.bndstone.com ---> docker 2 虚拟机. |
1、域名解析:
1 2 | A记录 ---> web1.bndstone.com ---> 8.218.77.154 A记录 ---> web1.bndstone.com ---> 8.218.77.154 |
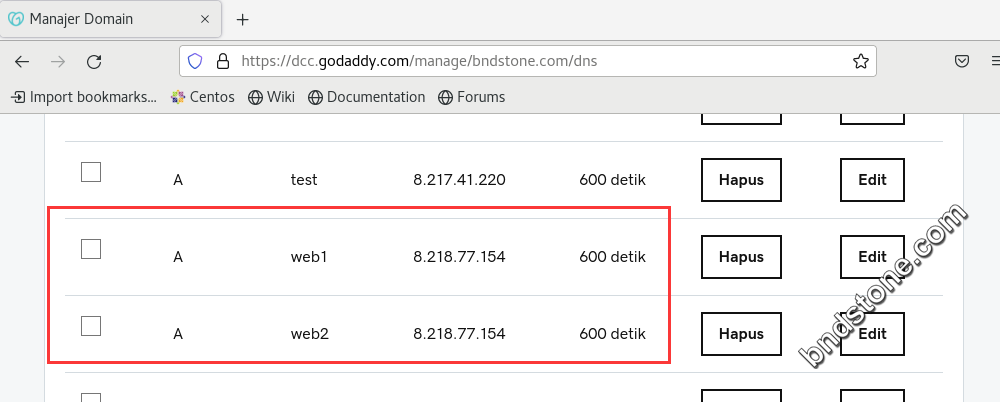
2、创建两个docker 容器.
2-1、创建容器 1
1 2 3 | docker run --name centos7 --privileged -d -e "container=docker" -p 8091:22 -p 8092:80 -p 8093:443 -p 8094:5901 --restart always ansible/centos7-ansible /usr/sbin/init docker exec -it centos7 /bin/bash //进入容器 ctrl+p再ctrl+q //退出伪终端,容器后台继续运行 |
1 2 | 8.218.77.154:8092 ---> 80 8.218.77.154:8093 ---> 443 |
创建容器 2
1 2 3 | docker run --name centos77 --privileged -d -e "container=docker" -p 8081:22 -p 8082:80 -p 8083:443 -p 8084:5901 --restart always ansible/centos7-ansible /usr/sbin/init docker exec -it centos77 /bin/bash //进入容器 ctrl+p再ctrl+q //退出伪终端,容器后台继续运行 |
1 2 | 8.218.77.154:8082 ---> 80 8.218.77.154:8083 ---> 443 |
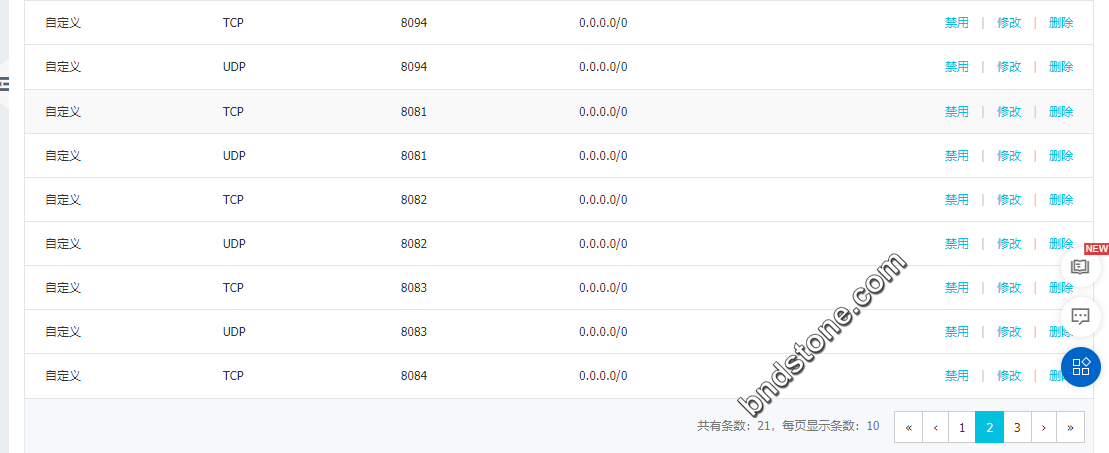
2-2、阿里云后台放行端口
1 2 | 8091/tcp ,8091/udp,8092/tcp ,8092/udp,8093/tcp ,8093/udp,8094/tcp ,8094/udp 8081/tcp ,8081/udp,8082/tcp ,8082/udp,8083/tcp ,8083/udp,8084/tcp ,8084/udp |
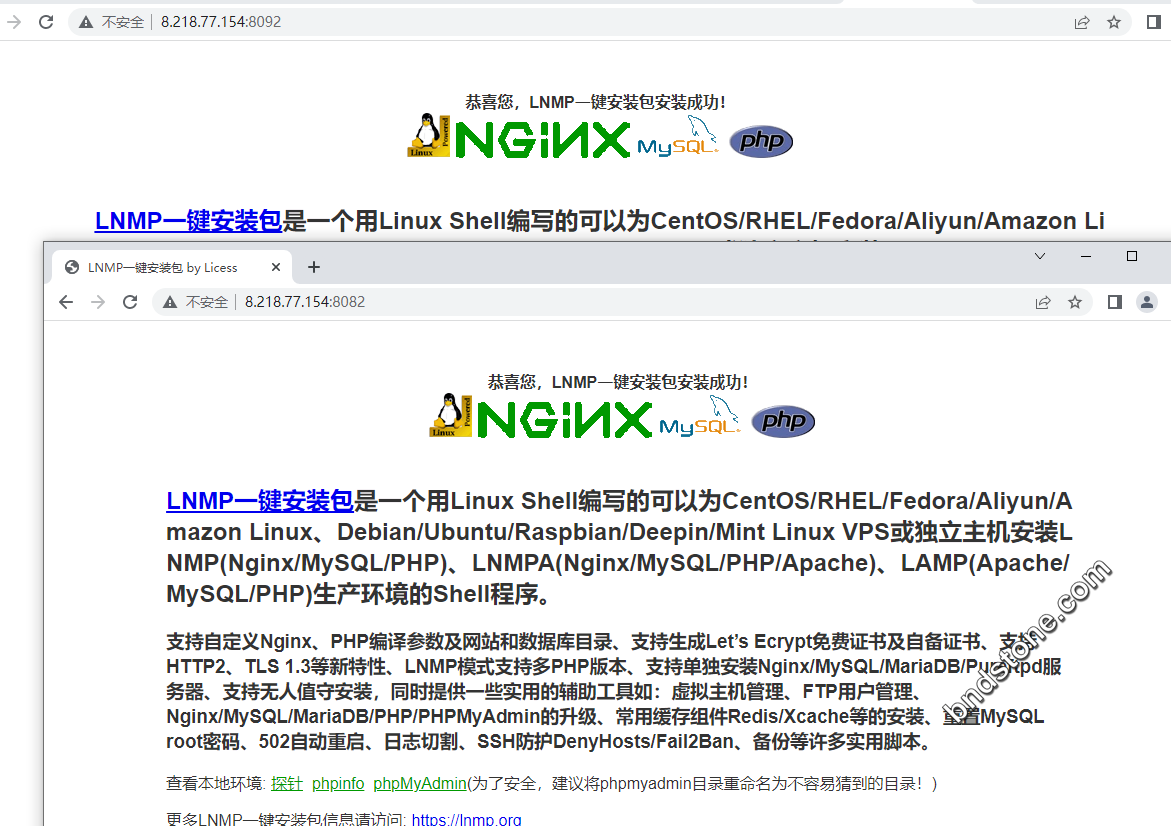
2-3、8.218.77.154:8092 及 8.218.77.154:8082 都已经成功安装LNMP
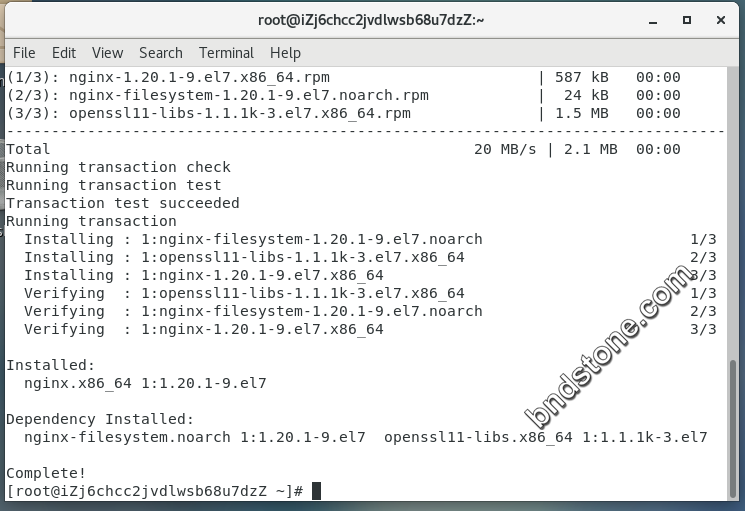
3、宿主机安装nginx
1 | yum install -y nginx |
1 2 3 4 5 6 7 8 | systemctl status nginx.service //查看nginx是否启动 systemctl start nginx.service //开启nginx systemctl restart nginx.service //重启nginx systemctl stop nginx.service //关闭nginx systemctl enable nginx.service //开机自启动nginx ps -ef | grep nginx //查看进程apache/httpd netstat -anpl | grep 'nginx' //查看服务端口 |
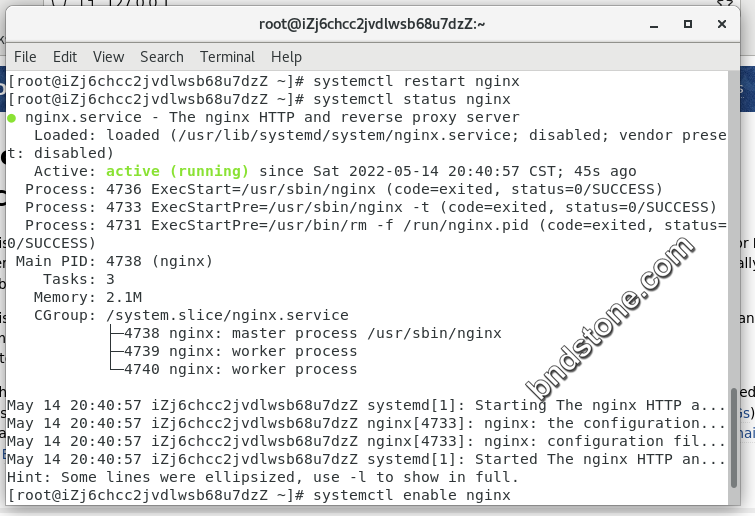
1 2 3 | /etc/nginx/nginx.conf //yum方式安装后默认配置文件的路径 /usr/share/nginx/html //nginx网站默认存放目录 /usr/share/nginx/html/index.html //网站默认主页路径</pre> |
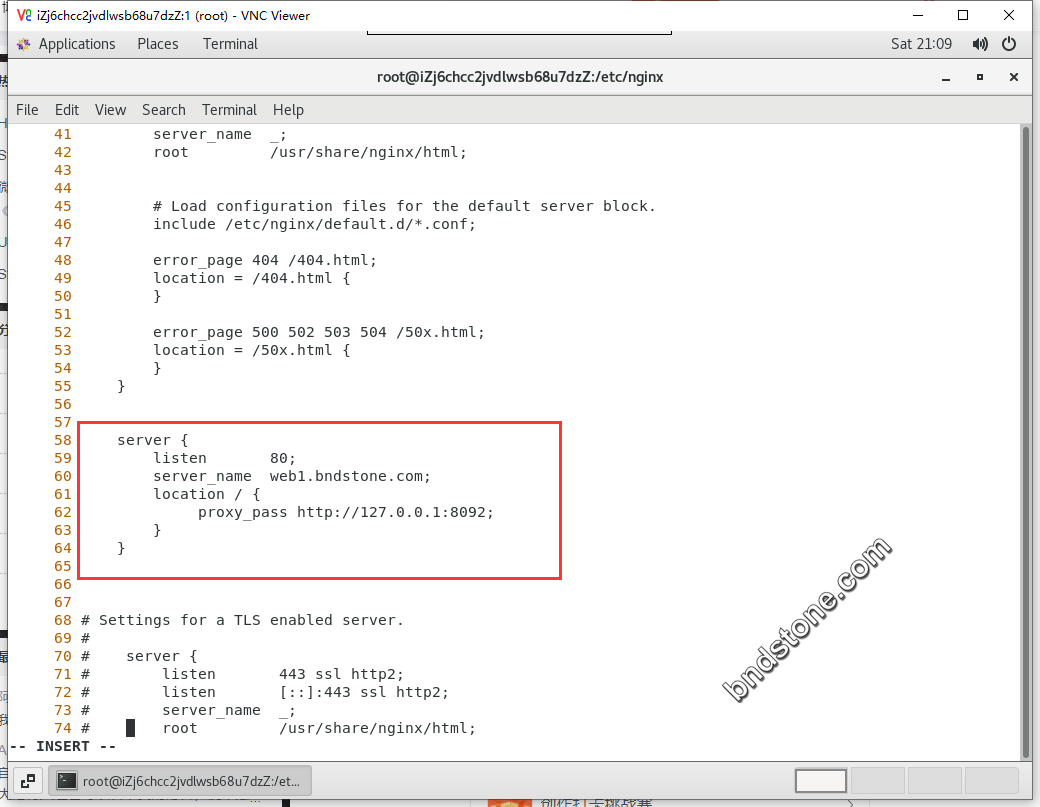
4、在nginx.conf 中添加server段
1 | vi /etc/nginx/nginx.conf |
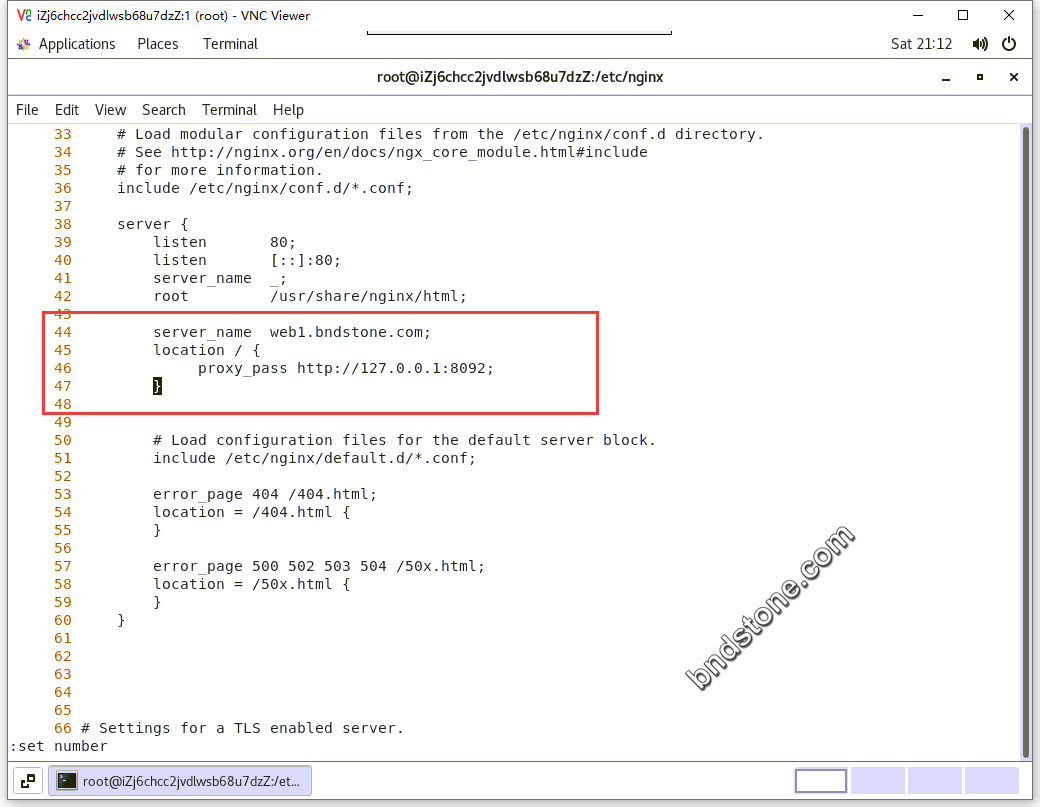
1 2 3 4 5 6 7 | server { listen 80; server_name web1.bndstone.com; location / { proxy_pass http://127.0.0.1:8092; } } |
1 2 3 4 | server_name web1.bndstone.com; location / { proxy_pass http://127.0.0.1:8092; } |
1 2 3 4 5 6 7 8 9 10 11 12 13 14 15 16 17 | firewall-cmd --zone=public --add-port=8091/tcp --permanent firewall-cmd --zone=public --add-port=8092/tcp --permanent firewall-cmd --zone=public --add-port=8093/tcp --permanent firewall-cmd --zone=public --add-port=8094/tcp --permanent firewall-cmd --zone=public --add-port=8091/udp --permanent firewall-cmd --zone=public --add-port=8092/udp --permanent firewall-cmd --zone=public --add-port=8093/udp --permanent firewall-cmd --zone=public --add-port=8094/udp --permanent firewall-cmd --zone=public --add-port=8081/tcp --permanent firewall-cmd --zone=public --add-port=8082/tcp --permanent firewall-cmd --zone=public --add-port=8083/tcp --permanent firewall-cmd --zone=public --add-port=8084/tcp --permanent firewall-cmd --zone=public --add-port=8081/udp --permanent firewall-cmd --zone=public --add-port=8082/udp --permanent firewall-cmd --zone=public --add-port=8083/udp --permanent firewall-cmd --zone=public --add-port=8084/udp --permanent firewall-cmd --reload |
解决docker容器网络不通的问题
解决方案:把docker0网卡添加到防火墙trusted域
1 | firewall-cmd --permanent --zone=trusted --change-interface=docker0 |
======================================================
5、将网站部署到 docker 中后,会对 docker 容器绑定域名,下面来讲解一下域名绑定的方法。
假设:容器的80端口映射到了宿主机的8092端口,ip地址是8.218.77.154,我们要将web.bndstone.com绑定到容器中。
方法:
创建ginx容器
进入容器,进入 /etc/nginx/conf.d 目录,创建 web1.bndstone.com.conf ,配置内容如下
1 2 | cd /etc/nginx/conf.d vi web1.bndstone.com.conf |
1 2 3 4 5 6 7 8 9 10 11 12 | server { listen 80; server_name web1.bndstone.com; location / { proxy_pass http://8.218.77.154:8092/; proxy_set_header Host $host; proxy_set_header X-Real-IP $remote_addr; proxy_set_header REMOTE-HOST $remote_addr; proxy_set_header X-Forwarded-For $proxy_add_x_forwarded_for; } } |
保存配置文件后,重启nginx:
1 | service nginx reload |
上述操作完成后,通过浏览器访问 web1.bndstone.com 即可访问网站。
======================================================
6、telnet ip:端口都不通.
1 2 | yum install -y telnet telnet 172.17.0.2:80 |
返回如下信息,说明网络没通.
1 2 | telnet: 172.17.0.2:80: Name or service not known 172.17.0.2:80: Unknown host |
6-1、进入容器, yum install wget 都不通了.
1 2 | docker exec -it centos77 /bin/bash //进入容器 ctrl+p再ctrl+q //退出伪终端,容器后台继续运行 |
1 | yum install telnet |
返回如下信息
1 2 3 4 5 6 7 8 9 10 11 12 13 14 15 16 17 18 19 20 21 22 23 24 25 26 27 28 29 30 31 32 33 34 35 36 | Loaded plugins: fastestmirror, ovl Could not retrieve mirrorlist http://mirrorlist.centos.org/?release=7&arch=x86_64&repo=os&infra=container error was 14: curl#6 - "Could not resolve host: mirrorlist.centos.org; Unknown error" One of the configured repositories failed (Unknown), and yum doesn't have enough cached data to continue. At this point the only safe thing yum can do is fail. There are a few ways to work "fix" this: 1. Contact the upstream for the repository and get them to fix the problem. 2. Reconfigure the baseurl/etc. for the repository, to point to a working upstream. This is most often useful if you are using a newer distribution release than is supported by the repository (and the packages for the previous distribution release still work). 3. Run the command with the repository temporarily disabled yum --disablerepo=<repoid> ... 4. Disable the repository permanently, so yum won't use it by default. Yum will then just ignore the repository until you permanently enable it again or use --enablerepo for temporary usage: yum-config-manager --disable <repoid> or subscription-manager repos --disable=<repoid> 5. Configure the failing repository to be skipped, if it is unavailable. Note that yum will try to contact the repo. when it runs most commands, so will have to try and fail each time (and thus. yum will be be much slower). If it is a very temporary problem though, this is often a nice compromise: yum-config-manager --save --setopt=<repoid>.skip_if_unavailable=true Cannot find a valid baseurl for repo: epel |
6-2、容器之前及 容器与宿主机之间都无法通信.
1 | ssh root@172.17.0.3 |
会返回如下信息:
1 | ssh: connect to host 172.17.0.3 port 22: Connection refused |
7、重新新建一个容器.
1 2 3 | docker run --name centos71 --privileged -d -e "container=docker" -p 8091:22 -p 8092:80 -p 8093:443 -p 8094:5901 --restart always ansible/centos7-ansible /usr/sbin/init docker exec -it centos71 /bin/bash //进入容器 ctrl+p再ctrl+q //退出伪终端,容器后台继续运行 |
1 2 3 | docker run --name centos72 --privileged -d -e "container=docker" -p 8081:22 -p 8082:80 -p 8083:443 -p 8084:5901 --restart always ansible/centos7-ansible /usr/sbin/init docker exec -it centos72 /bin/bash //进入容器 ctrl+p再ctrl+q //退出伪终端,容器后台继续运行 |
8、进入容器(先别安装lnmp.否则会导致 yum update -y 都出问题)
1 2 3 4 5 6 | yum update -y yum install -y wget //安装wget yum install -y telnet //安装telnet yum install -y net-tools //安装ifconfig ,否则连ip是多少都查不到 yum install -y openssh-server //安装sshd yum install -y firewalld && yum install -y firewalld-filesystem && yum install -y firewall-config //安装firewalld.service |
1 2 3 4 5 6 | systemctl start firewalld.service && systemctl enable firewalld.service firewall-cmd --zone=public --permanent --add-port=22/tcp && firewall-cmd --zone=public --permanent --add-port=22/udp firewall-cmd --zone=public --permanent --add-port=80/tcp && firewall-cmd --zone=public --permanent --add-port=80/udp firewall-cmd --zone=public --permanent --add-port=443/tcp && firewall-cmd --zone=public --permanent --add-port=443/udp firewall-cmd --zone=public --permanent --add-port=5901/tcp && firewall-cmd --zone=public --permanent --add-port=5901/udp firewall-cmd --reload |
容器内安装 lnmp1.6 ,全部正常.能正常通信.
容器内安装 lnmp1.8 ,会引起容器内无法通信的问题(6-1、6-2、)
=================================
暂时还没研究的几个贴子
如何配置CentOS7 firewalld 以允许容器自由访问宿主机的网络端口.
1 | https://www.it610.com/article/1288625382240624640.htm |
Docker与iptables及实现bridge方式网络隔离与通信操作
1 | https://www.jb51.net/article/200697.htm?pc |
docker因iptables规则清空而网络故障解决一例
1 | https://blog.51cto.com/u_11804445/2050759 |
关闭ip路由转发功能,容器即不能联网
1 | echo 0 > /proc/sys/net/ipv4/ip_forward //这边一定是“1",不能是“0", 否则容器不能联网. |
容器不能访问mac宿主机的服务
1 | http://t.zoukankan.com/koushr-p-14559481.html |
Nginx+Keepalived双机热备(主主模式)
1 | https://www.daimajiaoliu.com/daima/47da1906a100407 |
我不知道你们有没有测试,最后主备模式,keepalived有一个脚本,脚本的意思是当Nginx宕机脚本自动检测到然后停止Keepalived服务,
老师测试直接手动关了,我测试时那个脚本是无法自动运行的,有很多坑,老师没说。我整理了一下,有需要看看
https://blog.csdn.net/weixin_44790046/article/details/106857369
使用docker 创建nignx 注意创建容器时端口监听, 默认创建容器是桥接模式,端口映射那个端口就只能监听端口,
127.0.0.1是容器里的内部的 建议创建容器时更改网络模式 为host模式,使用docker创建nginx的大家可以注意下 ,希望可以帮助到大家!
其实可以不用,但是代理的proxy_pass 里面的IP需要是容器的虚拟IP。比如tomcat它的虚拟容器IP是127.17.0.3,proxy_pass 就要配置成http://172.17.0.3:8080
1 | https://www.bilibili.com/video/BV1zJ411w7SV?p=2 |
尚硅谷Nginx教程由浅入深
1 2 | https://www.bilibili.com/video/BV1zJ411w7SV?spm_id_from=333.337.search-card.all.click https://www.bilibili.com/video/BV12F411871i?spm_id_from=333.337.search-card.all.click |